hi everyone. …
as promised before, today i start with my step by step tutorial how to build a remote controlled baneblade-variant. and to keep it simple i decided not to make it too complicated, but i promise, that in the end they will move! …. further i decided to keep it as cheap as possible to make it easier for you to copy it without the need of investing hundreds of euros, first.
i’m posting every progress i make in new articles with increasing numbers. so it should be easy for you to follow.
but now let’s start with the first one.
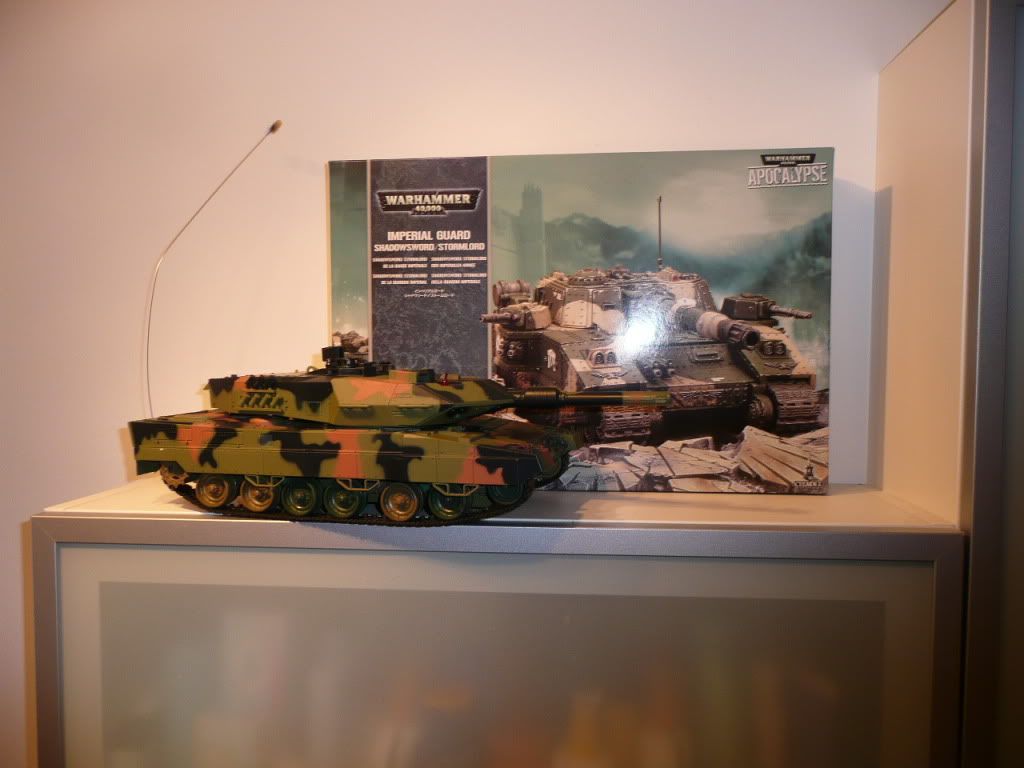
below you can see the basic kit that i decided to use as organ donor. of course there’s also some other stuff you’ll need, but for the beginning this very cheap leo2 from heng long is the most important thing, because we’ll take motor, controller, batterypack, electronics and lights from it. this tanks costs 35 euros on german ebay. the quality is lousy and the model itself is not really a leo2, but more a mixture of leo2, t90 and abrams …. – but to be honest that’s exactly what makes it so perfectly fitting for what we are planning to do.

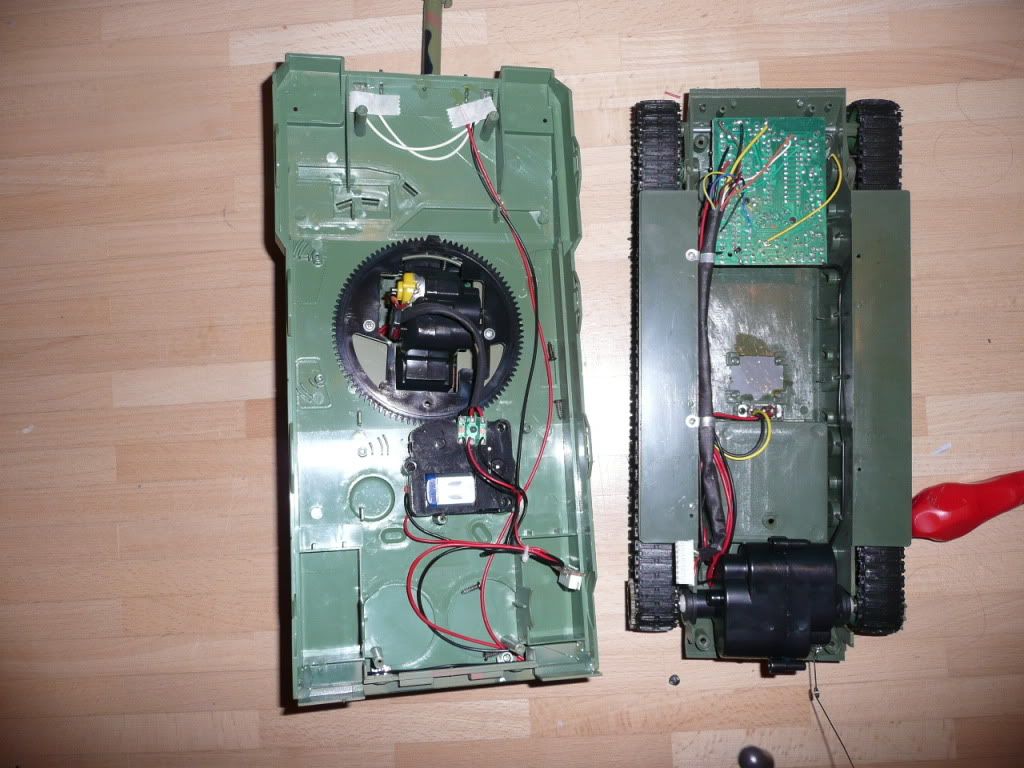
first of all you need to remove 5 screws connecting top and bottom section. than you should find something like this.

-
as you can see the cabling is not to complicated and should be relatively easy to understand. with the screws removed you only need to disconnect the big white plug you can find in the left rear area of the chassis and you’ll get the 2 major parts this tank consists of. for the moment you don’t need to care about the upper section, because we’ll need to remove the motor including controllerboard next.
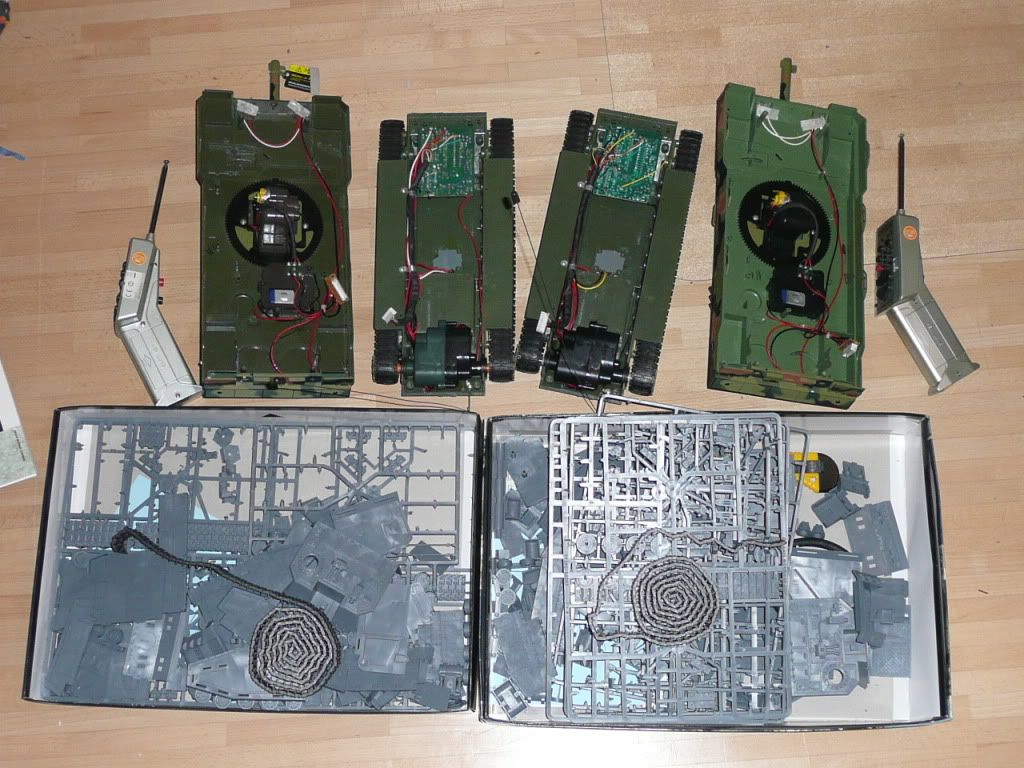
and as you can see in the next pic, i’m not only building one, but 2. if you look closely, you’ll also find a pair of tracks laying in each of the baneblade boxes. these treads are from VSTanks m1 abrams in 1:24. but hey … – isn’t that a leo2-tank ?!??!? … yes … that’s right. … but later you’ll see that the m1-treads will fit perfectly on this rearwheels, that we use for acceleration.
-

-
so ok … that’s it for today … .
with the next article i’ll remove the motor and controllerboard, and start to prepare the baneblades rearsection for the motor.
i hope you’re looking forward to part 2.
thanks for reading.
bobpanda.

Hey, are those ‘VSTank mi abrams tracks’ hard tracks or soft tracks? and where can i get them from? i found a site that has that has them both but i dont know if theyre the right ones:
Hard tracks:
http://www.artistichobbies.com/proddetail.php?prod=VST02100494
Soft tracks:
http://www.artistichobbies.com/proddetail.php?prod=VST02004356
Wow! That is so cool that you converted your GW stuff to RC. I used to be into RC and I know what a lot of work it was for you to do that. I’m really impressed. Especially that you got the main turret to move up and down as well and turn. Really, really, cool.
I can’t show this to my boys or they will want me to make one for them!