- part 2: gunners and a dozerblade-
building a adequate vehicle for a wolflord
i think today there’s no need for an introduction or something …. because most of you should have already read the first part of this series which was about the reliefs. this article should be seen as the second part to complete the conversions- and buid-related matter in this series. as the headline says this one will start with the gunners. so let’s get down to business …. :
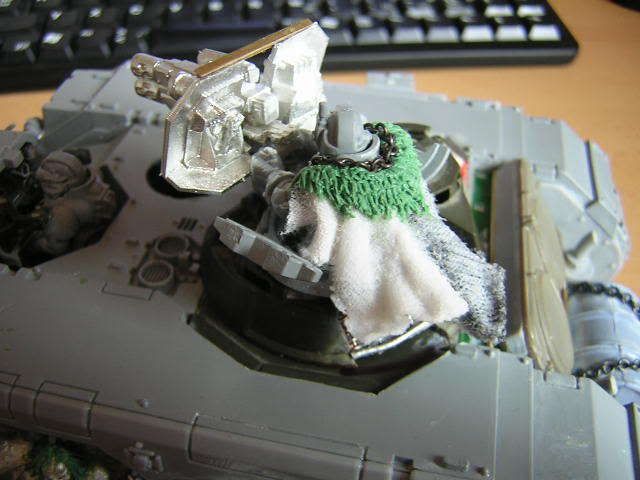
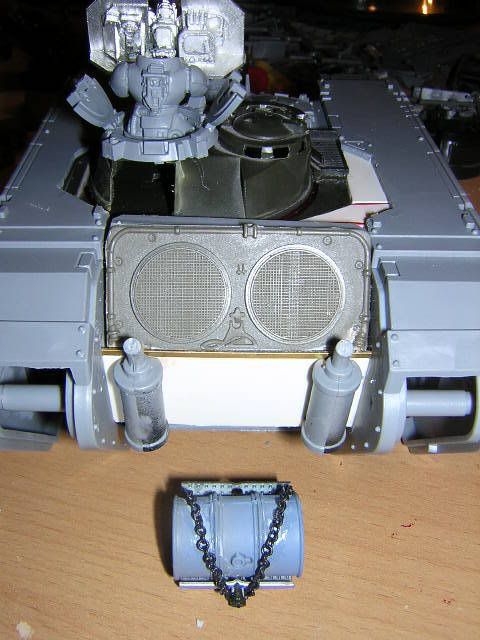
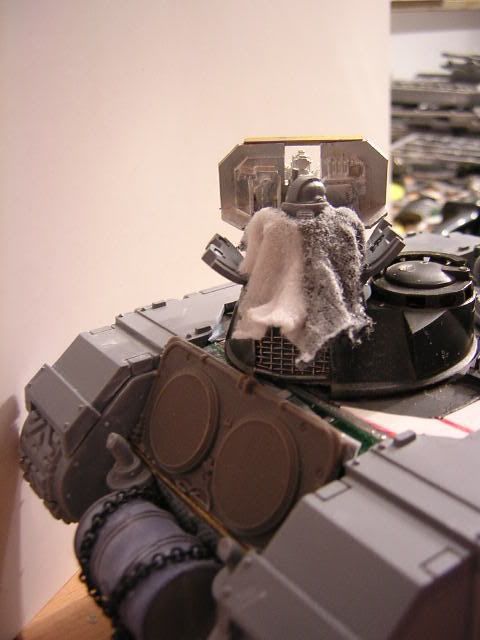
in the pic on the left you can see the gunner on top, firing the multimelter. the first thing you might notice is his cape that was made using realclothing. (later i’ll write an article about this technique, because everytime i post models, where i used it, i get several requests to describe how it exactly works…) a quite simply and efficient technique which uses real cottoncloth and superglue to create clothy things. ![]() the colar is made out of GS and should represent some kind of hairy pelt. further the cape is connected to the armor with a chain around the marines neck. next thing you can see on this pic is that the gunner is not simply “sitting” on the roof, but little higher on a additional turret, that i attached on top of the LR. it came from a german gepard tank in 1:35. smaller details in this pic are, the small tin bar in top of the melter-shields to give them more stability and the completely redesigned rearsection, including exhaustings, fuelbarrel and ventilation-unit taken from a leopard2 model in ~1:48 or something. last to mention is the frontgunner crewing the hull mounted guns, that were normally controlled from the inside. the lower part of the turret -or the insert- came from a m163 vulcans minigunturret (1:35).
the colar is made out of GS and should represent some kind of hairy pelt. further the cape is connected to the armor with a chain around the marines neck. next thing you can see on this pic is that the gunner is not simply “sitting” on the roof, but little higher on a additional turret, that i attached on top of the LR. it came from a german gepard tank in 1:35. smaller details in this pic are, the small tin bar in top of the melter-shields to give them more stability and the completely redesigned rearsection, including exhaustings, fuelbarrel and ventilation-unit taken from a leopard2 model in ~1:48 or something. last to mention is the frontgunner crewing the hull mounted guns, that were normally controlled from the inside. the lower part of the turret -or the insert- came from a m163 vulcans minigunturret (1:35). 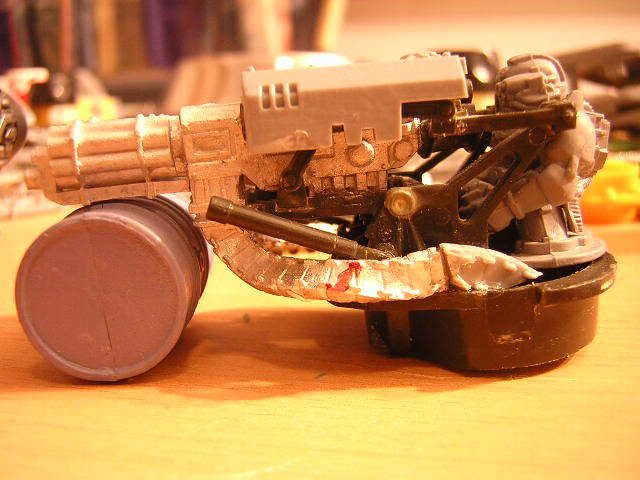
all i had to do was to remove the minigun and install the landraiders guns instead. the driver was already fitting behind pretty well without much adjusting. than i took a gripper and bend the ammobelts into right position, to make them look as if they were coming from somewhere out of the turrets sides.
that’s it! … – pretty easy, isn’t it? ![]()
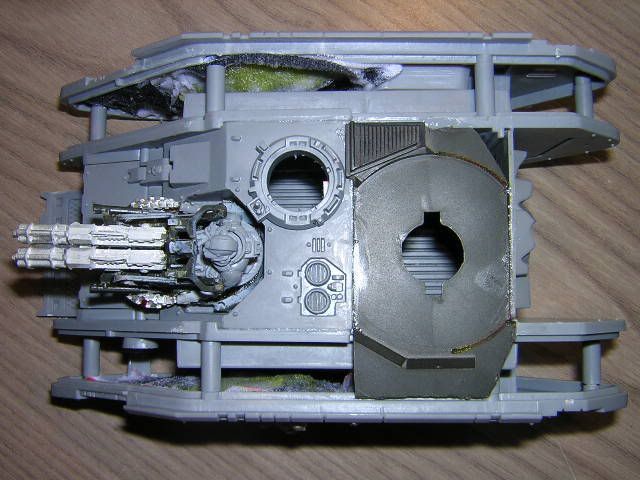
with the next pic, i’ll finish the gunner-related section in this aricle to continue with the dozerblade ….. – but please take your time to look at the shot made from above, first. there’s some information “hidden” in it ![]() ! – because this shot does not only show how i integrated a part of the gepard-tank in the landraiders roof, but also provides a view on the reliefs backsides and shows how far the the reliefs protrude into the tanks sidesections.
! – because this shot does not only show how i integrated a part of the gepard-tank in the landraiders roof, but also provides a view on the reliefs backsides and shows how far the the reliefs protrude into the tanks sidesections.
dozerblade:
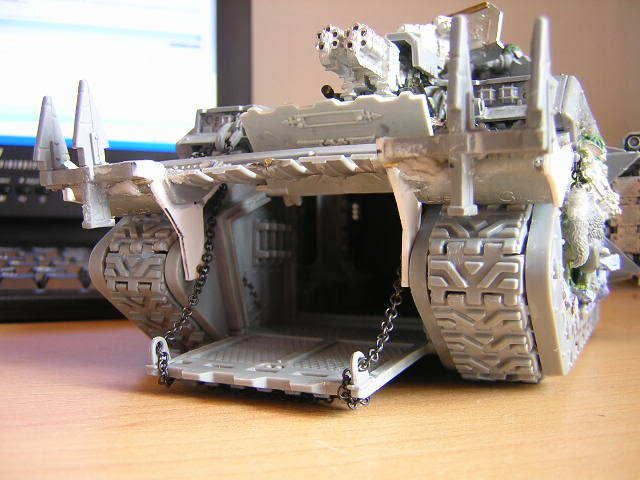
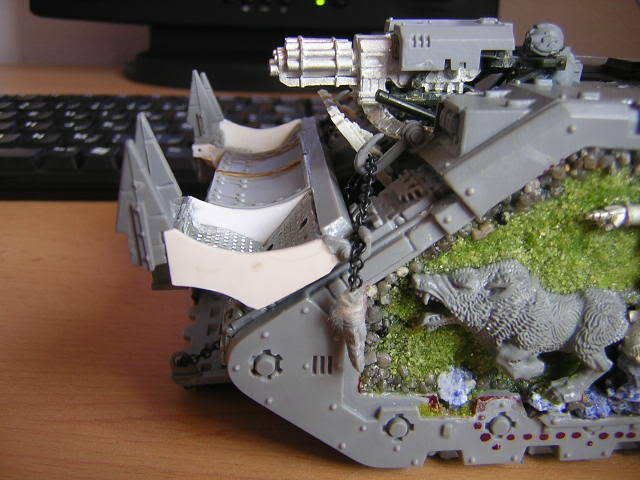
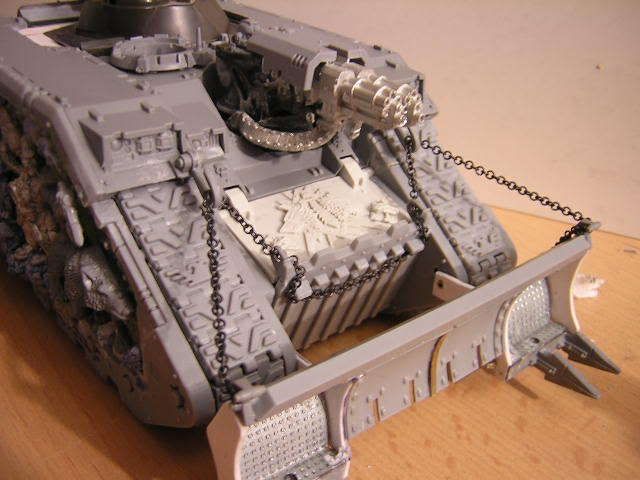
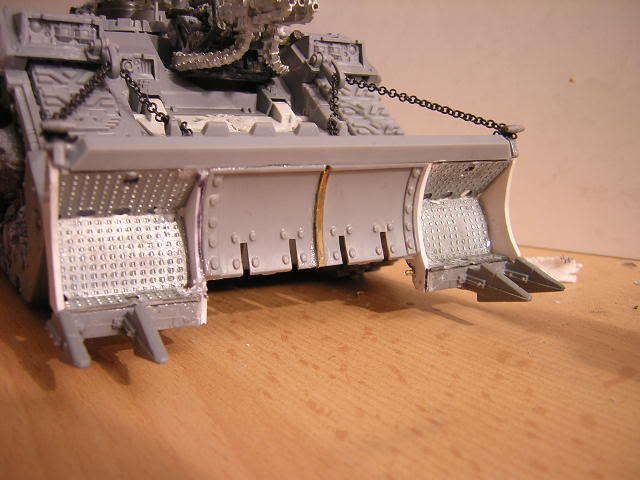
i think there’s not much to say about the dozerblade. i simply wanted to give it a try. -… to attach a dozerblade to a landraider that actually would still allow the ramp in the front to open. in my case this was even more important than normally, because i already dismissed the sidedoors for the reliefs. further the front gunners functionality should not be penetrated by the dozerblades mechanism, as well. and as you can see here — i made it:
to make the mechanical part look more realistic, but also not too technological, i simply connected the ramp with the dozerblade, using a small chain, to demontrate some kind of pulley. the blade itself was made out of a original blade from the old IG verhicle sprue, shortened to the right lenght and glued again in the middle. the metal parts attached on the sides are normally needed in the transportation-industry to fasten palletes with plastic bonds. ![]()
i also decided to replace the original upper part of the front doors, with the one from forgeworld.
no, that there’s not much more left to say, here are two additional pics, showing the rearsection and also providing another angle on the roofgunner.
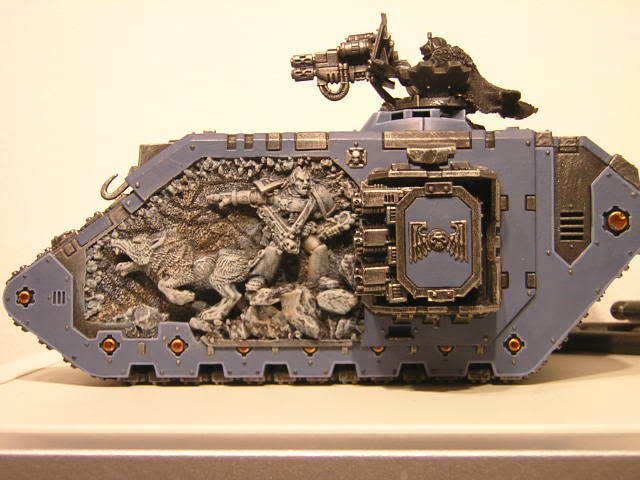
… so let me close this article with a pic showing the landraider from the side with a already started -but still very wip- paintjob, ok?! … ![]()
thanks for reading ! …
BobPanda.

Nicely done with the dozerblade and the ramp doors!
Michael
Bro that dozerblade is pro. Good job man. Keep up the good work.
fantastic work all round m8 really wish you well with this stuff.
I am so impressed with this, especially that panel. Gorgeous work.